
How to Photograph Jewelry
June 27, 2009 by webmaster
Filed under Photographing Jewellery
How to Photograph Jewelry
By Sasha Petrovich
Photographing jewellery can be tricky, but with a few concepts and budget below US$500 it is possible to achieve near-professional look of the photographs. This guide is intended for absolute beginners. Terminology is simplified, and camera adjustments are discussed with only jewellery in mind.
[Hidepost=1]
1. Equipment
1.1 Digital SLR
Biggest spend for near-professional look of jewellery photography is for the digital SLR. This is an absolute must. Second-hand camera will be as good. Camera without many features and without high Mega-Pixel rate will work just as fine. 3 Mega Pixel is more than enough.
Note that what makes the difference is the quality of the optical system, not the number of actual pixels.
Digital SLR will allow you to manually adjust every aspect of the camera. Automatic modes are not appropriate for jewellery.
1.2 Lighting
Avoid using any flashes. Don’t use camera’s built in flash. Don’t buy stand-alone flashes. In fact, don’t buy any lighting equipment. Desk lamps 60W-100W will do just fine.
Photo tent will help a lot, but is not mandatory. You get find them for as little as US$20. Terminology varies, so “Photo Tent” will also be called “Light Cube”, or “Soft Light Box”. Do your searching and find one approx 20″ (50cm) in size.
You will need 3 lights. Two matted lights — soft lights, and one reflector light. Place one matted light left of the area for jewellery, and one to the right. Place reflector light near where the camera is.
Whatever you do, avoid mixing light types. Use only non-fluorescent lights, and isolate your photo ‘lab’ away from natural light.
1.3 Tripod
To have freedom with many settings that will be a must, we will have to use longer exposures. For longer exposures to achieve maximum sharpness, we’ll need a tripod. Our hand shakes too much, when camera runs at exposition 1/2s or 1/5s. Buy a ‘tripod’ for US$10-$20. You don’t need a heavy duty tripod. If your setup will be on a desk, you can chose mini tripod – approx 10″ (25cm), and stand tripod on the desk as well, or longer tripod, approx 50″ (125cm) and stand it on the floor.
2. Setup
Position the lights as described above. Two desk lamps with soft light (irrelevant if you are using photo tent — the tent is there to soften the light), and reflector light at the front. I keep the cube open at the front, for easier adjustments and photographs, unless jewellery is highly reflective of the image of me taking photograph.
Uniform background colour is recommended. White background works great. Black background is a little harder to work with. I use one of the white wooden shelves that was sitting in the garrage. Hardware stores will sell these for a few dollars.
Jewellery neck stands look effective only on some pieces, but for most laying on the white surface is the best.
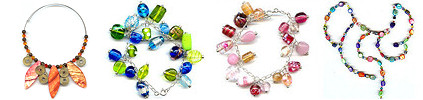
3. Jewelry Arrangement
Spend time arranging jewellery. Clean the jewellery if needed. Polish and remove finger prints. Lay it nicely. For chains, spend time to even out all links and to lay it in a perfect circle. For fashion jewellery this may be a little tricky simply because it’s made of various materials and it just doesn’t like to sit perfectly on its own. Use blue-tac to fix it where you want it.
4. Taking Photographs
Set your camera to manual. This is where you can adjust all settings yourself. You can leave auto-focus on if you wish, that is about the only setting you can have automatic. Disable camera flash. With static lighting and without using flashes, you can spend time moving the lights until you get perfect setup, before taking shots.
Learn the following 5 camera adjustments: Aperature (f-number), Sensitivity (ISO number), Shutter Speed (Exposure), White Balance, and Focus. These 5 are your bread and butter.
4.1 Aperature
Also known as f-number. This setting widens or narrows the lens, limiting the amount of light that comes into the camera. This directly affects shutter speed, and film sensitivity (since we’re using digital camera, film sensitivity is adjustable like anything else).
This setting is responsible for the ‘focal lenght’. With high f-number eg f/22 or f/11, when taking jewellery photographs, parts that are close to camera will be focused as well as parts that are further away. With low f-number, eg f/2, only the focused part will be in-focus, and parts of jewellery that are further apart or closer to the camera will become fuzzy. Use this setting as it suits you. You may want to create certain effect, but if you don’t, keep this setting to f/11. Overdoing this setting will limit the light coming into the camera, and you’ll have to make sacrifices elsewhere to compensate.
4.2 Sensitivity
Also known as ISO number. This used to be film property, and expressed in numbers like ISO200, ISO400, ISO800 etc. The higher the number, more sensitive the film, less light it needs, and thus more expensive. In Digital SLR’s this is merely just a setting, but the higher the number, more noise camera will capture. The more light you have, you can go lower with this number. For our limited lighting, ISO800 or ISO1600 will be fine, but try not to use ISO3200 — it adds visible noise.
4.3 Shutter Speed
Also known as exposure, it is a measure of time camera will be taking the light. When photographing moving objects, you would want this fairly short: 1/200 or or 1/400. However, we’re taking static objects, and with the tripod camera is static as well. This gives us flexibility in going as low as 1/30 or 1/10, or even 1/2. Value 1/2 means that camera takes light from the object for half a second. If anything moves during that half a second, photograph will be blurred.
Adjust shutter speed freely until you get desirable effect. In fact, when taking photographs of jewellery against white background, you will want photos over-exposed. Over-exposure should affect only the white background, where small imperfections of white surface will vanish into pure white. If your camera has light meter, it will display a warning that you have too much light, number 2 or 2.5 could be flashing in your viewfinder. This is good :-).
If your background is black, you’ll want it under-exposed. This will keep the black background black, remove some imperfections, but leave the jewellery just fine.
4.4 White Balance
With different colours present in every light source, our eyes naturally adjust to what white is. Cameras try to do the same and for general photography are quite good at it. However, for jewellery, you’ll want to try all manual pre-sets yourself and chose best result. If everything fails, manually adjust white balance, until it’s good. You won’t need to keep changing this setting from one jewellery piece to another.
4.5 Focus
Jewellery is static. It’s easy to use manual focus, but auto-focus seems to work just as fine. If camera keeps focusing on the incorrect part, just switch to manual, and away you go. For most applications, auto-focus will be fine though.
4.6 Taking photographs
Take enough photographs for each peace. Use camera built-in display as a guide only. Colors and brightness will look slightly different on the computer screen. You can adjust some of it afterwards, but try to take a perfect shot in the first place.
5. Post-Processing
Restrain youself from using too many features of the photo editing software. All you need to do is manually adjust Brightness and Contrast, and perhaps use ‘Sharpen’ feature. Don’t apply any automatic adjustments, as these will get confused with too much white in the photo, or too much black.
Crop to the area you want to keep, save in internet-friendly format (eg 400×300) and you’ve got a near-professional photograph. Reuse the same photograph for ‘zoom-in’ crops. You won’t be making images larger, instead you’ll be cropping from your original, adjusting and saving.
Digital camera with 6 mega pixels or more will preserve enough of the detail for zoom-in’s. If not happy, re-take photos of the detail.
Copyright (c) 2006 Sasha Petrovich
Sasha Petrovich works for Phaze 3 Gallery as technical consultant, including photographing all the jewellery for printed and online material. View his works at Phaze 3 Gallery website http://www.phaze3.com.au
Article Source: http://EzineArticles.com/?expert=Sasha_Petrovich
[/Hidepost]
+
 Click
Click